A few more illustrative photos are on Google+, for those who prefer the visual summary.
The problem
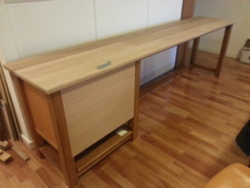
In the Christmas holidays of 2011, I realised something. I had a more or less standard 1.35m x 0.75m x 0.73m (WxDxH) study desk. It sucked.

So c. 18 Dec 2011, I decided to change that.
I think I needed something that could capture a few user stories well:
- I have up to 3.15m to work with. Why not use it?
- Potential for an Eyefinity / Surround setup
- The full depth of the desk felt like wasted space (it’s been a long time since CRT monitors were common)
- I still tinker with my PCs frequently
- I thought I could use the space far more efficiently, e.g. space under the drawers was barely used – an accessible shelf would be nice for say a few Raspberry Pi(s) and a game console or two
- I’d grown used to having 3+ drawers
- I don’t care about a bunch of things like wheels or height-adjustability
Designing and planning the solution
Firstly, some constraints. Being six floors up makes taking things in through the window nearly impossible. That leaves the fire stairs and the elevator. Long story short, the elevator had the best potential – a little over 3m on the longest diagonal.


Further 350mm is taken by a display for some of the trinkets I’ve acquired on my travels to places like the Great Barrier Reef, Coober Pedy, Lightning Ridge and Cradle Mountain. Hence we come to the first decision – the desk was to be about 2.8m long. Given that, I did some searching and there’s really next to nothing out there that comes close, though the 2.4m kitchen benchtop idea is interesting. I had a choice:
- Outsource it to a furniture builder
- Capitalise on my woodworking prowess acquired primarily through my high school education, where I’d built a table out of radiata pine with a jarrah shelf and top. Though that was a Year 10 major project, and this was definitely going to be on a much larger scale…
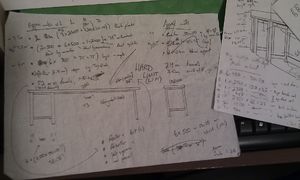
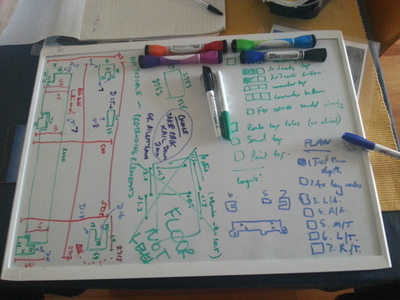
I chose the latter and set about planning. The plans above capture the high level overview, but are missing many minor details. The devil is always in the details.
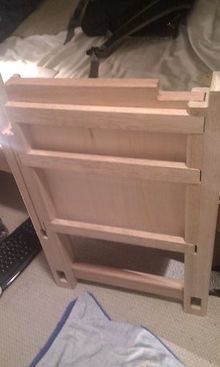
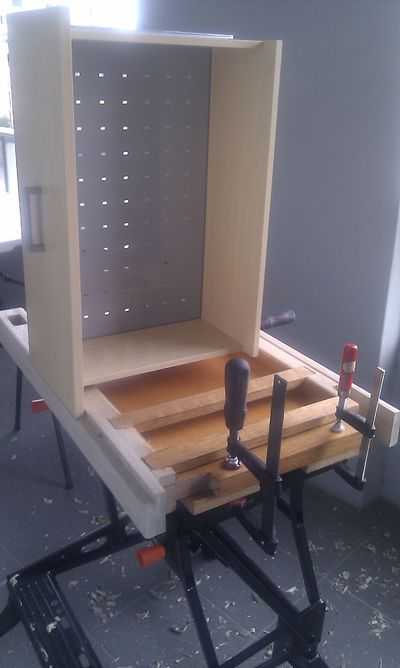
Details, details like drawers. Drawers make a table into a serious desk. They also add an extraordinary amount of complexity and intricacy. I wouldn’t have gone forward with them if I needed to dovetail and build from scratch. Thankfully I discovered the BA[123]-M/W self-assemble drawers at Bunnings so I updated my plans to add some support rails.

BA3-M/W drawer between four posts and some rails
Iterative construction
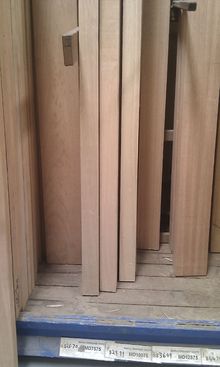
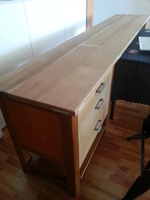
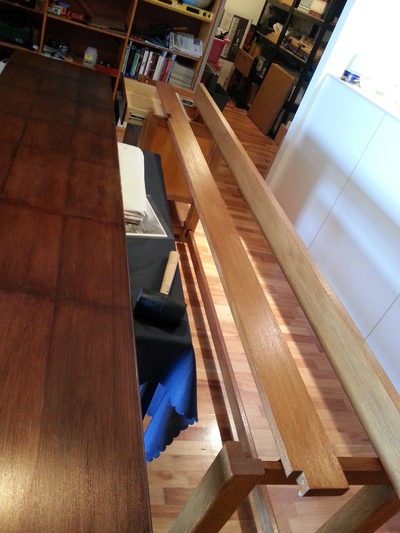
Armed with my drawings and sketchup, I spent a small fortune on wood (though still a little less than three 24″ Dell monitors cost) – cedar for the top (and drawer fronts I ended up replacing), and maple for the legs, lower shelf and rails. I chose cedar because it’s a softwood and hence relatively light for the distance travelled (the jarrah used on my previous project made it heavier than it looked – even the removalists commented on it), and maple as something different to the arguably too common (though cheap and effective) radiata pine.

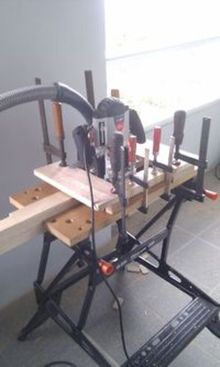
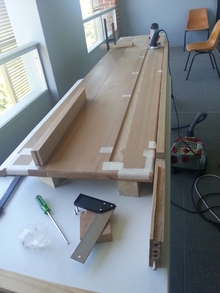
The other details all followed naturally from the above. For instance, given a need to go about 2.8m with a depth of about 600mm, I decided to biscuit-join three lengths (four pieces) of ~190mm cedar with a total end-to-end length of 8.4m. This also made my final depth closer to 570mm, which if anything has worked out even better, though practically quite close to the lower depth limit with my eyefinity setup.
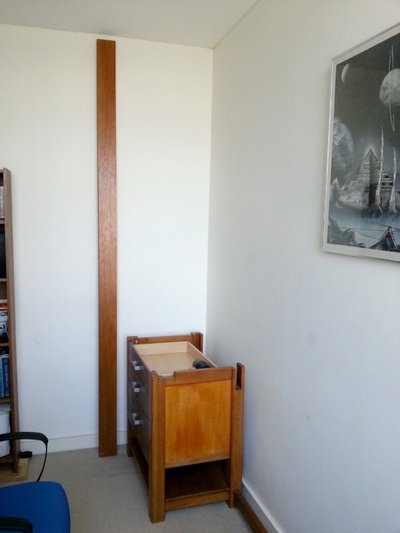
Another point was the need to route many pieces to more easily achieve things such as the 8mm-rounded top, legs and rails. Using a router is always a challenge. There’s consistently a need to test (the old adage measure twice cut once) – and plenty of offcuts went through it. The noise wouldn’t be a problem back in a suburban house, but can be an issue in high-density urban living, generally restricting use of power tools to working hours. Fencing is a requirement too – indeed I’d often spend twice as long fencing as routing. However routing done right is almost always faster than chiselling.


Final Results


A few things are still incomplete. My Logitech G930 broke, so I shall be looking for a new gaming keyboard in the near future. Sometime a little further off I’ll be in the market for an affordable 4K TV, and the geeks out there will determine I’m not running a true Eyefinity yet (the right two monitors are running off the main box, I’m dedicating the left Eyefinity monitor to the Xbox 360 for now, and the leftmost monitor to my legacy Windows XP gaming rig). There are dreams of a watercooled project, subject to the many complexities of implementation…
Overall after a week with this setup, I am loving it. Well worth it for something that really nailed* what I wanted.
* ironically I used no nails, indeed the only pieces of metal in the entire solution are the drawer’s rails, screws and handles. I’m not much of a metalworker, especially when it comes to MIG/TIG welding so I prefer to stick with my love of woodworking.

Wow! So interesting to read about the process and the finished product is very smart and user friendly. Your Poppa S would be so proud. He loved his woodworking. Looking forward to seeing it first hand sometime soon. Judy
LikeLike
That looks stunning!It must be a massive let-down coming into the standard set up at work 🙂
LikeLike